Your Toyota's roof rack transforms a capable vehicle into an adventure-ready hauler - whether you're loading kayaks for a Minnesota boundary waters trip or stacking fly rods and camping gear for a Montana guys trip. The factory-installed roof rails and crossbars on vehicles like the 4Runner and Highlander can carry everything from rooftop cargo boxes to ski gear, but only if you secure it correctly. Improper loading leads to highway disasters, damaged equipment, and a ruined weekend with the guys.
Picture this: you've planned a week of fly fishing on the Madison River with your college buddies, and halfway through Wyoming, you hear that sickening thud of shifting cargo. Or worse, you watch your kayak cartwheel down I-35 during your Minnesota trip. These scenarios are entirely preventable with the right techniques and about fifteen minutes of attention before you leave the driveway.
Understanding Your Toyota Roof Rack System
Your roof rack has three main components that work together to carry loads safely.
Roof rails run front-to-back along the outer edges of your roof and serve as the foundation for everything else. Crossbars attach to these rails and run side-to-side - these are your primary cargo attachment points and the structural backbone of the system. Mounting points or feet connect everything to your vehicle's body.
Before loading a single piece of gear, check your owner's manual or rack manufacturer's guide for maximum weight capacity. This number isn't a suggestion. Exceeding it damages your vehicle and creates a genuine highway hazard. Most factory Toyota crossbars handle 100-150 pounds depending on the model, but that weight includes the accessories themselves. If you need additional capacity for Montana guys trips where you're hauling multiple tents, coolers, and fishing gear, aftermarket options from companies like Hooke Road offer durable mounting solutions with higher limits.
Choosing the Right Attachment Method
The gear you're hauling determines your approach. What works for a duffel bag fails spectacularly for a kayak.
Standard, Flexible, and Irregular Items
Bags, tarps, lumber, and similar cargo require basic tie-down straps. You have two options: traditional rope or purpose-built straps.
Rope works if you know your knots. A properly tied trucker's hitch creates excellent tension and has secured cargo for centuries. But most guys heading out for a weekend of fly fishing haven't practiced knot-tying since Boy Scouts. Cam-buckle and ratchet straps eliminate the guesswork. They provide quick, powerful tensioning with minimal skill required.
Regardless of your choice, always loop the strap around both the item and the crossbar. Never hook a ratchet strap to itself or attach only to the roof rails. The strap must completely encircle your cargo and the fixed attachment point. Manage excess strap material by tying it off or tucking it away. Flapping straps create annoying highway noise and slowly work themselves loose through vibration.
Specialty Gear for Outdoor Adventures
Kayaks, canoes, bikes, and ski equipment demand specialized mounts designed for secure transport.
Kayaks and canoes need J-cradles or saddle systems with three points of contact. Two straps secure the boat's body to the crossbars, while a third tie-down runs from the bow to your front bumper or tow hook. That bow line prevents lifting and shifting at highway speeds - critical when you're running 75 on I-90 toward your Minnesota kayaking spot with the guys.
Bicycles require dedicated racks. Tray mounts, fork mounts, and upright carriers lock frames or wheels directly to your crossbar system. Don't improvise with bungee cords.
Ski and snowboard carriers use rubberized pads to clamp gear securely without scratching. If you're hauling equipment for a Colorado ski weekend with work colleagues, these purpose-built carriers are worth the investment.
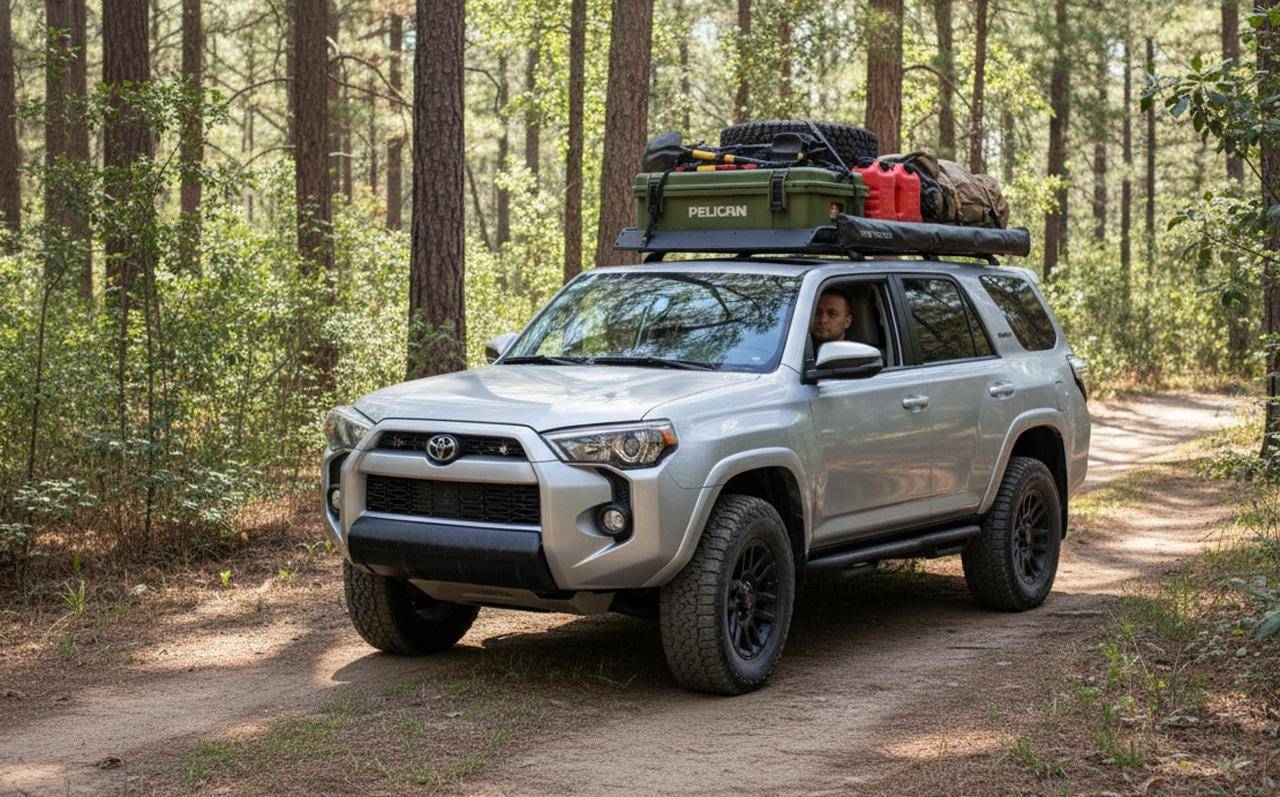
Rigid Cargo Boxes and Baskets
Rooftop cargo boxes and baskets mount directly to crossbars using integrated hardware.
Most boxes include U-bolts or quick-release clamps that wrap around your crossbars. Tighten these fasteners completely and check for any play before driving. A loose cargo box at 80 miles per hour is terrifying.
Don't forget interior organization. Loose items inside your cargo box shift during transit, creating distracting thuds and potentially changing your vehicle's weight distribution. Pack tightly and use smaller bags or containers to prevent movement. This matters especially on longer Montana guys trips where you're covering serious highway miles.
The Pre-Drive Security Checklist
Loading is only half the job. Before you pull out of the driveway, run through these three checks.
The Shake Test
Grab your cargo and try to move it forcefully in every direction - up, down, forward, backward, and side-to-side. If anything shifts even slightly, you need more tension or better strap positioning. Your gear should feel like an integrated, immovable part of the vehicle. If you can move it standing in your driveway, highway winds and road vibration will absolutely move it.
For quality roof rack accessories and tie-downs that hold up on rough roads, explore more options from established outdoor equipment vendors before your next adventure.
The Short Drive Test
Drive five to ten minutes at various speeds before hitting the highway. Listen carefully. Some wind noise is normal, but any new rattling, whistling, or flapping indicates a loose strap or improper routing. Pull over immediately and recheck your setup. Better to spend ten minutes in a parking lot than watch your buddy's fishing gear scatter across the interstate.
The Anchor Point Verification
Confirm your straps attach to the sturdiest available points. Crossbars and the main body of accessories like cargo baskets are designed for load-bearing. Using straps attached only to thin roof rails for heavy loads invites failure. The crossbars exist specifically to handle cargo weight.
Maintenance for Long-Term Reliability
Your roof rack system requires periodic attention to remain a trustworthy platform for years of guys getaways.
Remove crossbars and accessories when not in use. Empty racks create wind resistance that hurts fuel economy and causes unnecessary wear. You're not gaining anything by leaving them mounted between trips.
Inspect hardware regularly. Check bolts and clamps connecting crossbars to roof rails for rust or loosening. Road vibration slowly backs out fasteners over time. Catching a loose bolt in your garage prevents a problem on a remote Montana forest service road.
Clean your straps after trips. Wash out dirt and grit that can abrade and weaken fibers. Nylon and polypropylene straps last for years with basic care but degrade quickly when neglected.
Load It Right and Enjoy the Adventure
Proper roof rack loading takes fifteen minutes of attention and transforms your Toyota into a genuine adventure vehicle - one that reliably gets your kayaks to Minnesota lakes, your fly rods to Montana rivers, and your camping gear to wherever your next guys weekend takes you. The techniques aren't complicated, but they require consistency. Run through the same checklist every time, and your valuable equipment stays exactly where you put it, no matter how many miles of highway separate you from your destination.
One final consideration: weight distribution matters beyond simple capacity limits. Heavy items centered between the crossbars and balanced side-to-side improve vehicle handling and reduce strain on individual mounting points. An unbalanced load affects steering response and braking - something you'll notice immediately on mountain switchbacks heading to a Colorado trailhead.
